Thank you to everyone that participated in the "Zone VII" weekly photography assignment. There were several very beautiful images submitted for this assignment, and I really enjoyed seeing everyone's take on the assignment. The guidelines for this assignment were to expose your image by spot metering on a "Zone VII" area of your scene and using manual exposure set at +2 EV in order to ensure that you would be able to render that area of the scene as bright as possible while still retaining visible detail or texture.
Michele submitted a very nice series of images from Etzel Farm. Her
Horse image was a wonderful capture that conveyed the "energy" of the horse. This was a challenging exposure that could have very easily fooled the evaluative metering on the camera. It is situations like this that often call for manual metering, otherwise your results might be extremely inconsistent. This image tied with one of Michele's other images for
People's Choice. Greet job Michele!
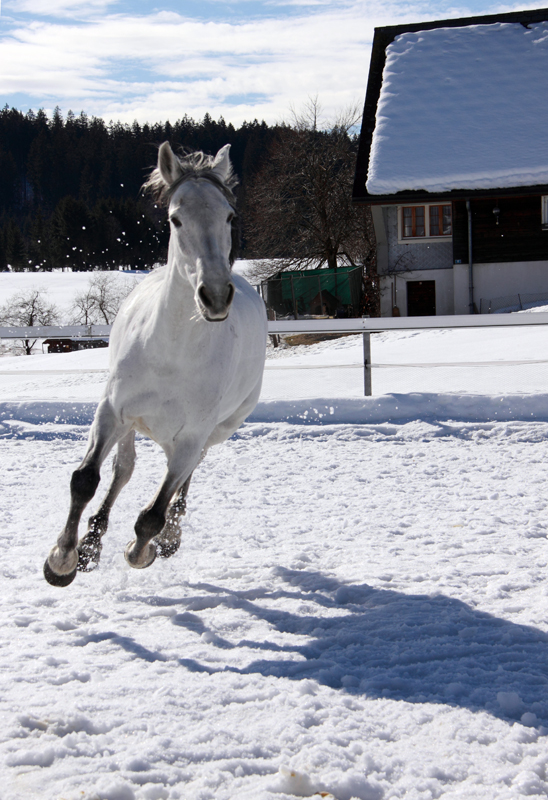 Horse
HorseTied for
People's ChoicePhotographed by Michele Bollhalder
Michele's
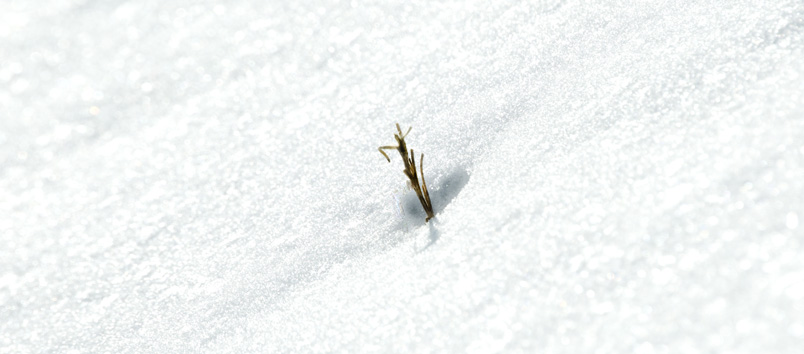
Etzel Light image was one of my favorites from the assignment. (Michele called the image
Etzel, but I added the
Light to differentiate the image from her other image named
Etzel.) This image was a beautiful example of the play of light (and shadows) on the land. We often forget that in photography, what we are really recording is the
light that is reflected from our subjects. It is refreshing to see an image like this that reminds us of the importance of the
light. The exposure for this image was just about perfect, holding back the exposure on the brightest areas of the snow just enough to retain visible detail. I loved the composition as well, and thought the lone post sticking out of the snow provided a wonderful counterpoint to the dark mass of trees on the ridge. I've awarded this image
Editor's Choice for Artistic Merit.
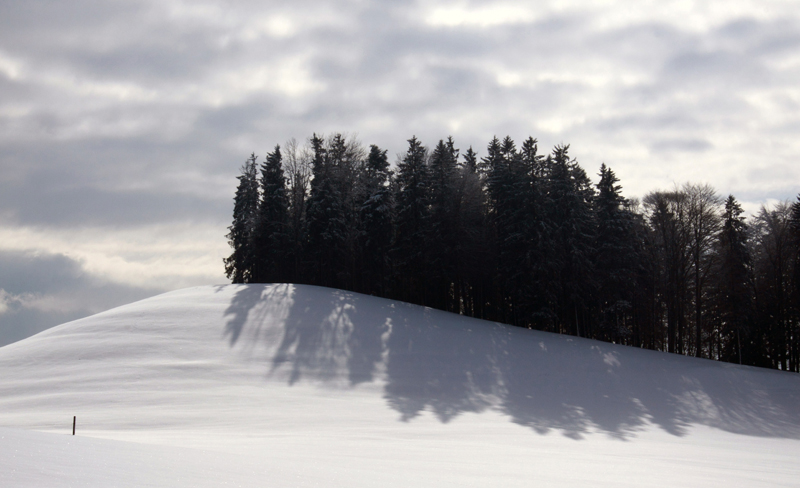 Etzel LightEditor's Choice for Artistic Merit
Photographed by Michele Bollhalder
Michele's
Etzel was another wonderful image, and obviously one that would not have been possible by simply leaving the exposure on evaluative and shooting without any exposure compensation. If you are curious, you could save this image and adjust the exposure (using Photoshop's Image>Adjustments>Exposure tool) and you would see that an exposure that renders this image as a "normal" exposure centered around midpoint totally changes the tone of the image. It changes from the ethereal image Michele posted into one that is dreary and foreboding. Often we need to consciously modify the "default" exposure on our camera in order to produce the image we are visualizing or mood we wish to convey. This image competed with Michele's
Etzel Light image as my Editor's Choice for Artistic Merit, but in the end the play of light in the first image won out.
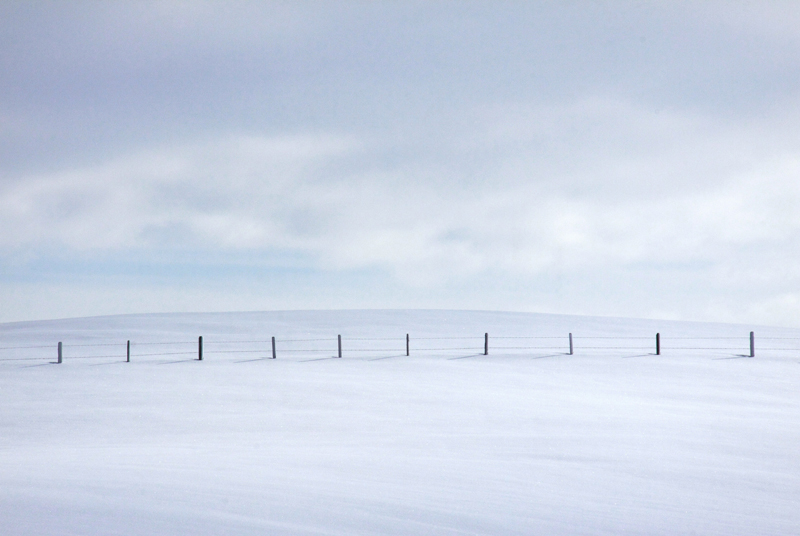 Etzel
Etzel Tied for
People's ChoicePhotographed by Michele Bollhalder
Dave's
Angel of Dunlap image was a departure from normal convention, but in the end his exposure worked well to impart an ethereal mood to his image of the angel. Normally I would try to avoid blowing out the sky, but in this case it works very well because it imparts the perception of radiant light that we associate with angels. I commend Dave for being brave enough to stray from convention and for producing an image that so successfully conveys the impression of an angel. It looks like Dave was shooting in challenging lighting conditions, and I fear that I would have just given up in such circumstances. I'm impressed that Dave was able to visualize and render such a great image in those circumstances.
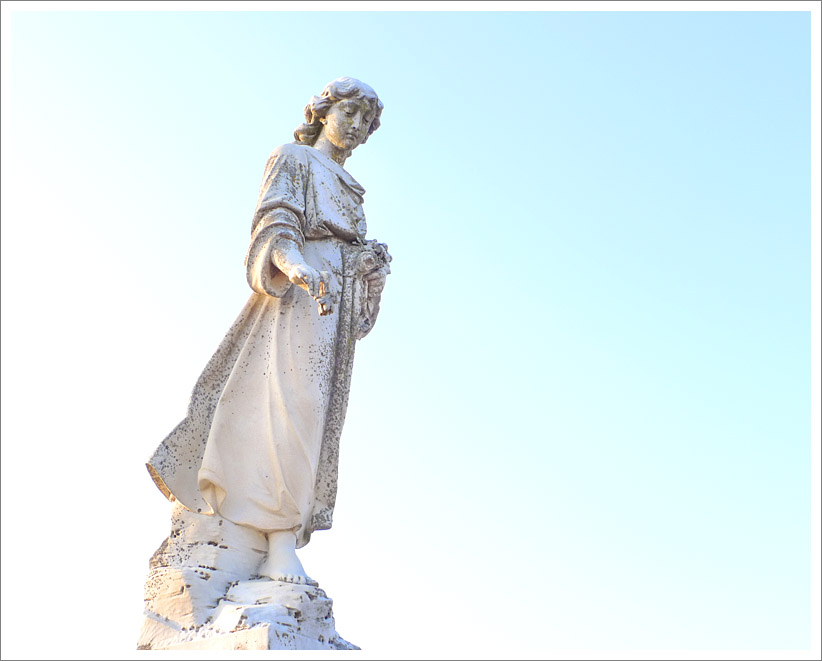 Angel of Dunlap
Photographed by Dave Leiker
Rebecca's
Full Moon image was another great excursion for the assignment (and a fun adventure for Evan, since he got to stay up late and help Mom photograph the moon). Rebecca was smart enough to apply our discussion on "protecting the detail" to the task of photographing the moon. A common mistake many photographers make is letting the dark sky surrounding the moon affect their exposure meter readings to the extent that the detail on the moon is blown out. This can be very frustrating as you try to bracket your shots or "guess" at the proper amount of exposure compensation to apply in order to retain the detail. Instead of fussing with exposure compensation, Rebecca simply set her camera to manual exposure, spot metered on the brightest area of the moon, and in accordance with the assignment recommendations, set her exposure meter at +2 EV. She forgot she had her exposure compensation set to -0.3EV, so it turns out that this shot was really taken at +1.7 EV. That worked great in this case, since the brightest areas on the moon were smaller than the spot metering point, and the metering was affected by the surrounding darker areas.
Rebecca's experience with exposure compensation brings up a very good point. If you are using a Canon dSLR, the design will prevent you from using exposure compensation and manual exposure at the same time, so no worries; however, if you are using a Nikon dSLR, you can inadvertently have exposure compensation set while you are trying to use the exposure scale for manual metering. So, if you have -0.7 EV set for exposure compensation, and you are setting your "scale" at "0", you should understand that you are really setting your exposure for -0.7 EV. For Nikon cameras, the exposure compensation and readings on the manual exposure scale are "additive." (Zero plus -0.7 EV = a "total" exposure of -0.7EV.) In Rebecca's case, having an exposure compensation of -0.3 EV set, and then setting an exposure of +2.0 EV on the scale resulted in an actual exposure of +1.7 EV. Make sense? It's always a good idea to check exposure compensation settings when you pick up a camera and get ready to shoot.
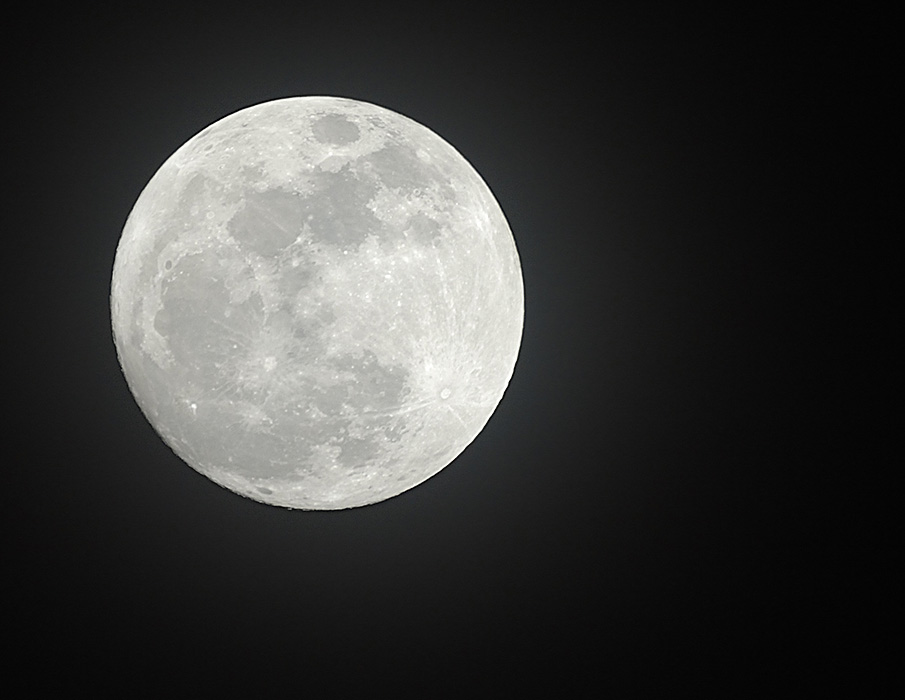 Full Moon
 Photographed by Rebecca
Sheila's image of
Famous Snow appears to have blown highlights, and viewing the histogram in Photoshop confirms this. I suspect this might have been due to not choosing the brightest area of snow to meter on, or, more likely, it might have been due to the fact that the exposure scale on Sheila's camera (Nikon D60) only goes to +2.0EV. Because of this, it is not immediately apparent when you have gone
over +2.0 EV. The Nikon camera's do have a small little "carrot" at the end of the exposure scale that illuminates when you have gone past the end of the scale, so paying attention to this indicator might help prevent you from going past your mark without noticing. Canon cameras don't have this "carrot" so you really need to pay attention when you are getting close to the end of the scale, and sometimes the only way to "know" that you are actually on +2.0 EV is to "click back" to +1.7EV and then back up one click to +2.0 EV. (Some more advanced Nikon cameras have exposure scales that go all the way to +_ 3.0 EV, which can be useful in these situations.)
 Famous Snow
 Photographed by Sheila Ancheta
Sheila came pretty close to nailing the exposure in her
Eggs in Line image, so I'd say in this case, "practice makes perfect." Great job capturing this exposure Sheila! I love the "modeling" and 3-dimensional effect provided by the great light in this image.
 Eggs in Line
 Photographed by Sheila Ancheta
As Sheila and I talked about in the assignment discussion topic, one of the biggest challenges was deciding where to spot meter in the
Li'l Angel image below. Once Sheila determined that the brightest part of the scene was on the angel's right cheek (viewer's right) and used that area for her spot metering then all the other areas of exposure fell into line (in a subsequent image).
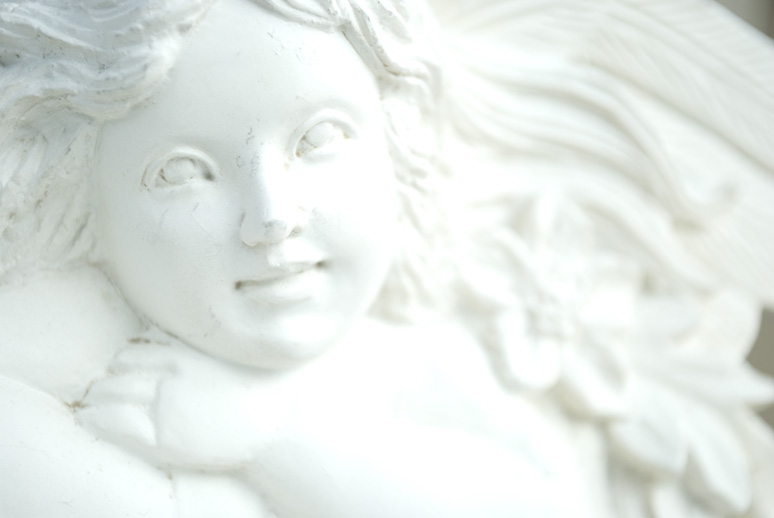 Li'l Angel
 Photographed by Sheila Ancheta
Michele's
Weird spot for a cross image was another wonderful submission. Michele and I had a discussion about "how bright is too bright," and my opinion was that the brighter image imparted a more ethereal feeling to the scene and complemented the subject matter better than the darker rendition, even if a bit of detail was lost in the transition between the snow and sky. This is a great image that leaves the viewer wondering about the scene.
 Weird spot for a cross
 Photographed by Michele Bollhalder
Rick did a great job capturing the detail in his
Walking in the Snow image. An examination of the histogram shows that he nailed the exposure in this image, with the histogram just bumping up against the right edge of the scale. (Good selection of focal length and aperture as well. I think Rick was practicing for the next week's assignment.

) I've awarded this image
Editor's Choice for Technical Merit. Great job capturing the detail in this scene Rick!
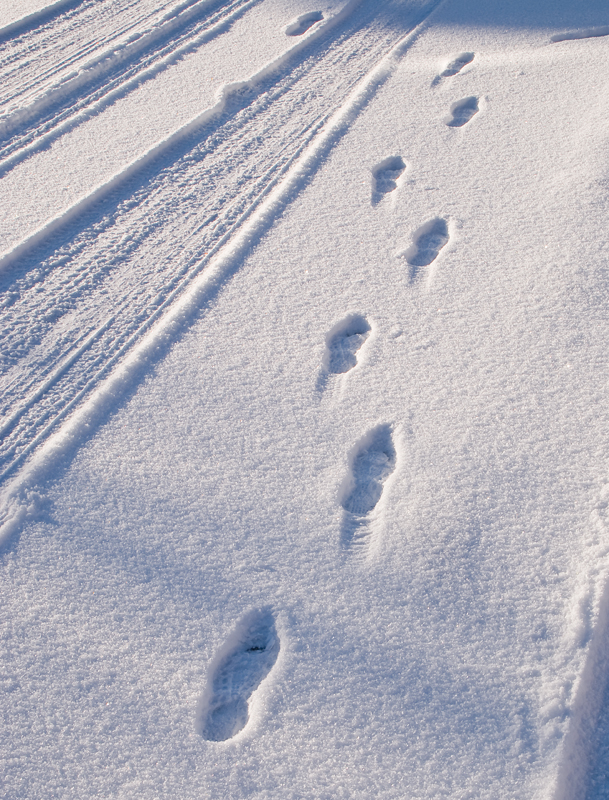 Walking in the SnowEditor's Choice for Technical Merit
 Photographed by Rick Pepin
Marilyn's
Snowy ridge shot at Bryce was very nicely exposed as well, and I was impressed with the level of detail she was able to capture in the scene. I might have played with this image a little bit in the raw processor in order to render the largest area of the snow just a little bit brighter.
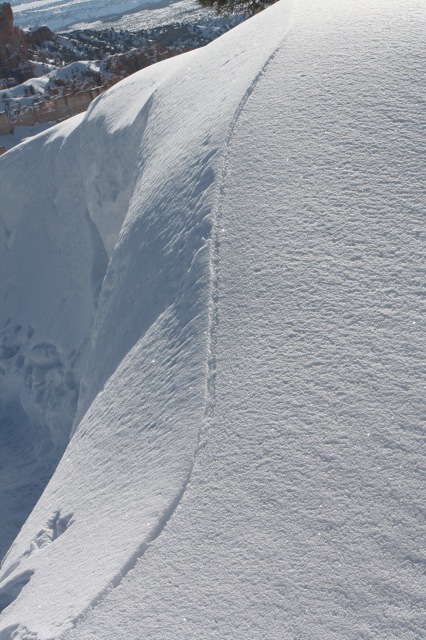 Snowy ridge shot at Bryce
 Photographed by Marilyn McKinney
Dave's
Cotton image was a wonderful image that reminded my of a bygone era. I played with the image a bit in Photoshop, and thought it still "held together" well with another 0.3 EV of exposure, which I thought helped accentuate the delicate intricacies of the lace.
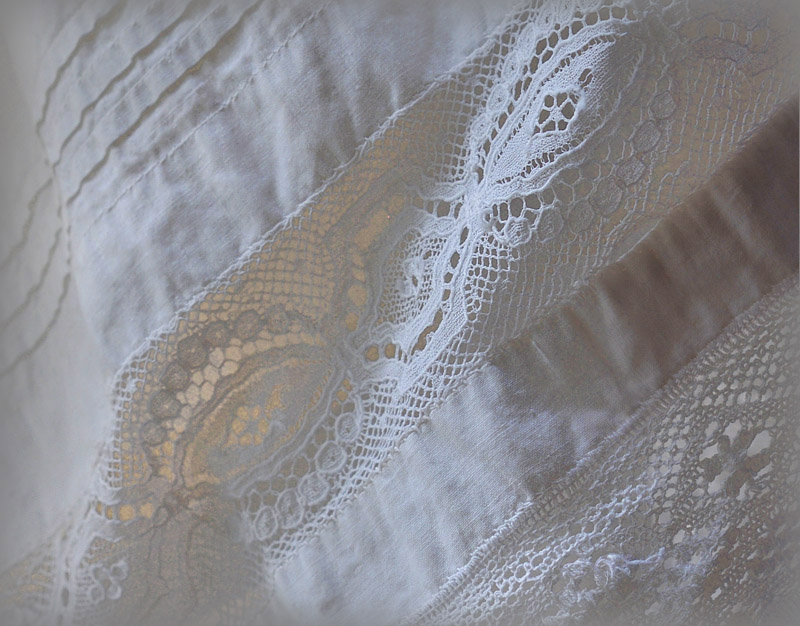 Cotton
 Photographed by Dave Leiker
Thank you to everyone that participated in this assignment. Rebecca and I really enjoyed viewing your images.
Viewers are encouraged to respond to this thread describing why you like a particular image, or think it was particularly successful at meeting the guidelines of the assignment.
Keith


