This was another assignment with many wonderful submissions. I'm disappointed that we don't have more people voting, since many of these images certainly deserved a vote or two. Maybe you should all tell your friends to login to the site and vote for their favorite images from the assignments... I suspect that if we had more voters then many more of the images would have received votes.
The
guidelines for this assignment were to to practice some of the lighting techniques covered in Chuck Gardner's article I linked to in the assignment description, and then hopefully tell us a bit about what you learned during the course of trying and practicing these portrait techniques.
I've debated for awhile whether 1-week or 2-week assignments work best. Sometimes, as with this assignment, I will extend the assignment either because I believe it is challenging enough that people will need more time or because I think the topic is important enough that it warrants two weeks of study and practice. This was one such assignment where I felt the assignment and underlying portrait techniques were important enough to warrant two weeks of practice. Rebecca thinks two week assignments work best and often encourages me to run the assignments for longer than one week. One of the potential drawbacks of running the assignments for two weeks is that it is easier for people to "get out of the habit" of participating. The most significant drawback though is that there might be a three week delay between the time the image is submitted and the time that we provide our feedback on that image. I think most educators understand that timely feedback is important to the learning process, and so I feel remiss when it takes me so long to provide positive reinforcement for an image that deserves it. Jaime's wonderful
Southern Warmth image is a great example of this. Jaime was the first to submit an image for the "Portraits" assignment, and at the time I thought it was wonderful, but several weeks passed and I sort of forgot about the image.
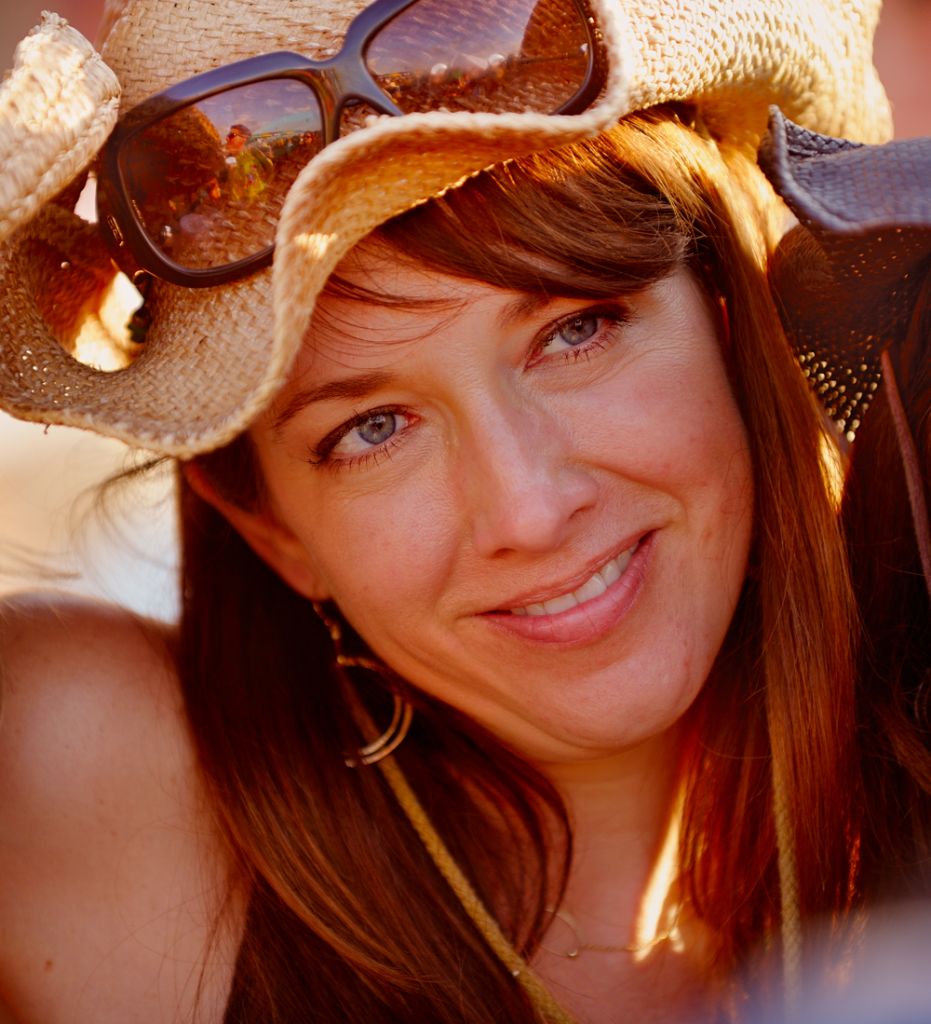
I'm glad for the opportunity to come back and revisit Jaime's
Southern Warmth, because it truly is exceptional. The funny thing is, it doesn't follow many of Chuck Gardner's ideas on portrait photography. The high contrast areas aren't on the face, and it doesn't use contrast to separate the "mask" of the face, or to draw the viewer's attention to the eyes and mouth area. Still, this is a wonderful portrait. Instead of using contrast, Jaime used a relatively narrow depth of field to draw the viewer's attention to the eyes (the windows to the soul) and to her mouth where we get most of our cues for mood and expression. Jaime very effectively selected a focus point and used a narrow depth of field to focus the viewers attention on these two critical areas of the face. This is a beautiful portrait that exudes personality and warmth, and I've selected this image as
Editor's Choice for Artistic Merit.
 Southern WarmthEditor's Choice for Artistic Merit
Photographed by Jaime Dorotan
I decided to play with the image a bit to see if I could make it even stronger, using some of the concepts Chuck discusses. One of the first things I noticed when I opened the image in Photoshop was that it didn't have an embedded profile. I suspect this was because the image was a bit too large when initially uploaded to the website, and unfortunately the software the website uses to downsize the images also strips any EXIF data (including embedded color space). Based on a "visual assessment" in Photoshop, I guessed that the original color space was probably Adobe RGB. Tagging the image with this color space toned down the saturation a bit on my monitor, but made the image more saturated on Rebecca's monitor. Embedding a color space enables Safari to display the image more consistently across different types of monitors. I suspect the version with the embedded color space is closer to what Jaime saw when post-processing his image on his computer. (Again, you should use Safari and not Internet Explorer if you want to see the true colors in this image.)
My primary reason for playing with the image was to try to tone down some of the competing high contrast areas in the image, and give the woman's face more contrast in relation to the rest of the image. I did this by using a technique Dave often uses, which was to apply a slight vignette around the perimeter of the image. This helped to tone down the high contrast area on the hat, and reduce the somewhat distracting white area in the lower right of the image. I also noticed that the warm color cast was "masking" the true blue color of her eyes, and reducing the potentially high contrast areas of the whites of her eyes and teeth to a lower contrast "warm" white. I duplicated the layer in photoshop, clicked "snap mid tones to neutral" in the curves dialog, and then used a layer mask to allow only the color-corrected eyes and teeth to display in the composite image. I liked the warmth of the sunlight on her skin, and wanted to retain that warmth in the remainder of the image to keep the same feeling of "southern warmth" imparted by the original. Here's the modified image. Is it "better"? I don't know. It definitely changes the "energy" of the image, subtly shifting it from a "laid back" image to one with a bit more vivacious smile. Even if the modified image isn't "better," hopefully it helps illustrate how we can implement some of the ideas that Chuck talked about to subtly guide the viewers attention within the image.
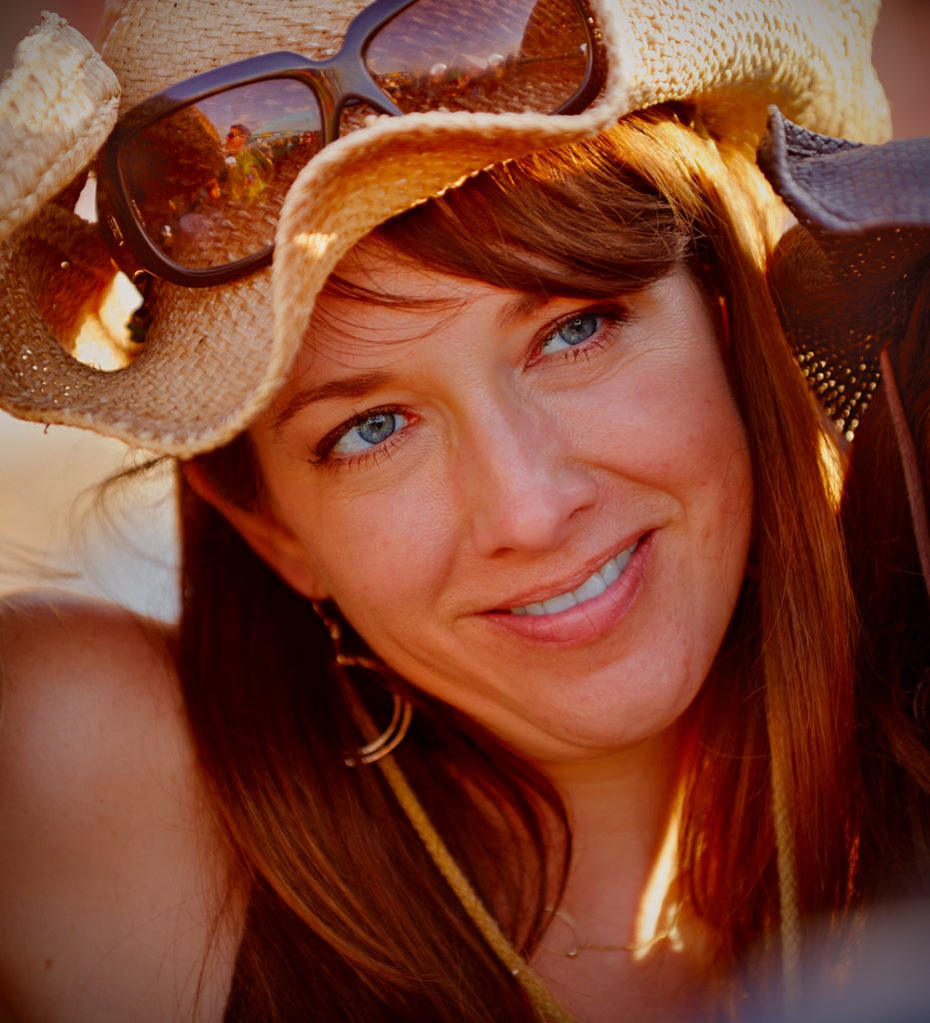 Southern Warmth
Photographed by Jaime Dorotan, slight Photoshop modifications by Keith
I love the intensity Dave captured in his
Cowboy Portraits - Calf Roping image. This "environmental portrait" captures the personality of that cowboy and intensity of the sport perfectly.
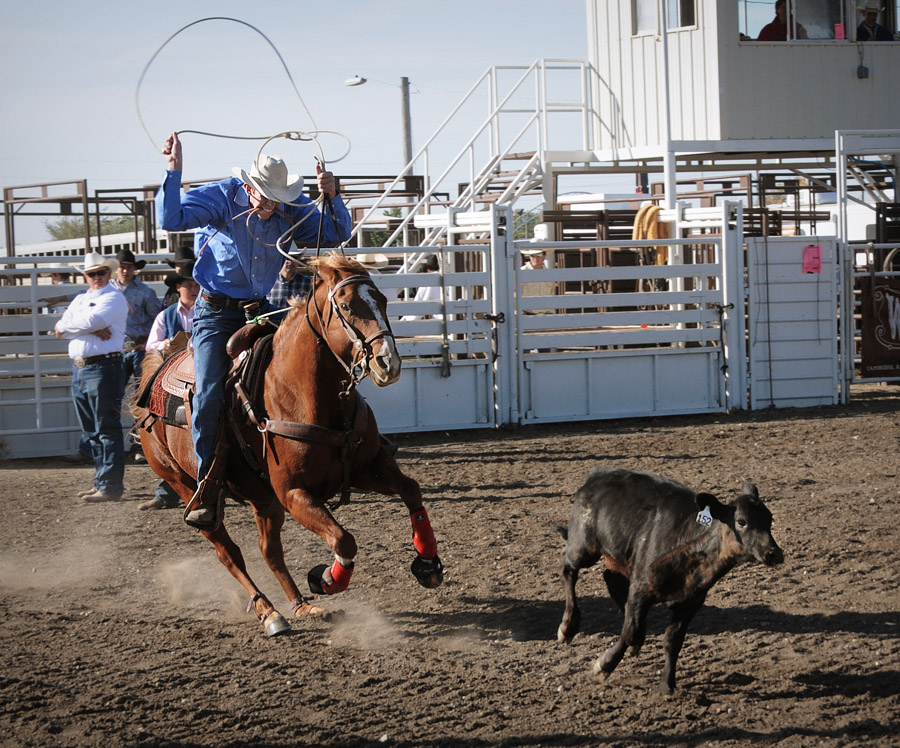 Cowboy Portraits - Calf Roping
Photographed by Dave Leiker
Dave's
Cowboy Portraits - In the Dirt image was even more intense, and was selected as
People's Choice. It took amazing timing to capture this shot! Converting this image to black and white (Sepia?) was a great way to give Dave more control over the tonality of the image and prevent some of the brighter areas from capturing too much of the viewers attention, and the vignette helped to contain the viewers gaze within the scene. Outstanding job Dave.
 Cowboy Portraits - In the DirtPeople's Choice
Photographed by Dave Leiker
Jaime's portrait of
Coacuatchoo's lost lover was an excellent image that took outstanding technique to capture, and I wish I could have been sitting there beside Jaime and his children on the rooftop as he narrated the legend. Outstanding capture Jaime.
 Coacuatchoo's lost lover - a portrait
Photographed by Jaime Dorotan (girod)
Michele's image of the singer was the one image submitted for this assignment that I thought followed Chuck Gardner's advice the best. Notice how the light creates a high contrast area on the "mask" of the singer's face, and how the shadow on the side of her face has a slimming effect? The light is a bit more high contrast that what I would normally select for portrait lighting, but it certainly helps convey the context of the subject.
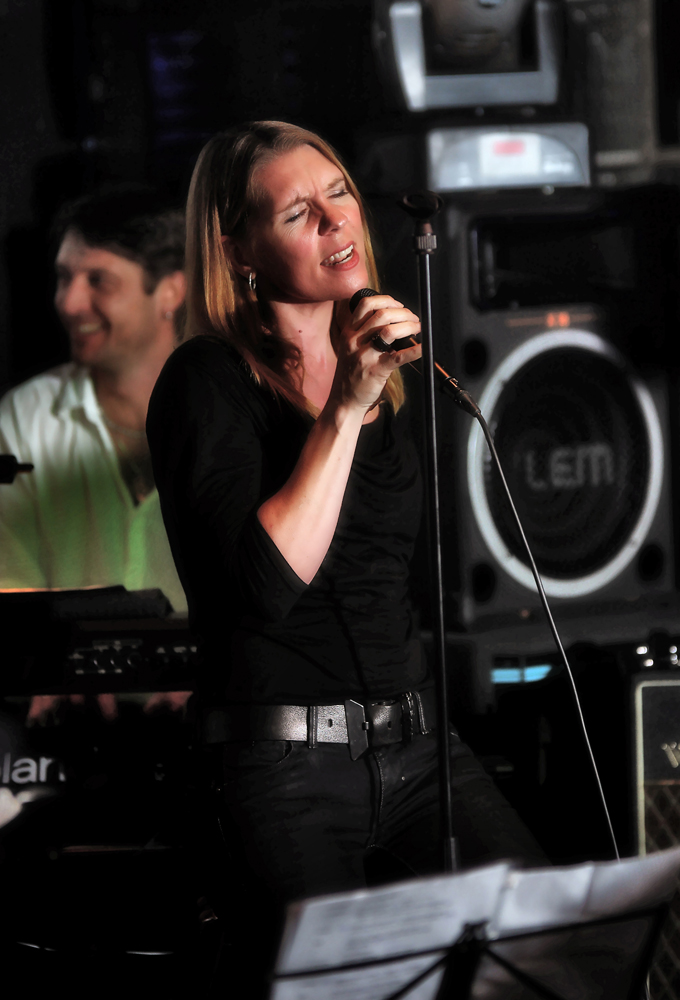 Michèle
Photographed by Michele Bollhalder
I did pull the image into Photoshop in an attempt to tone down the competing high contrast area on the singers arm. I used the shadows and highlights correction to pull down the highlights (that method seemed to keep the skin color more "realistic" than other methods), and used layer masks to select the areas of the corrected layer that I wanted incorporated into the final image. It's a minor change, but I think it helps prevent the high contrast area on the arm from pulling too much attention away from the face.
 Michèle
Photographed by Michele Bollhalder, reduced contrast in Photoshop by Keith
Jaime's
"Who Dat Say......." am I? was an engaging portrait that captured a snapshot in time of his son Neo J. Well done in challenging lighting conditions Jaime. These snapshots will become more precious with the years.
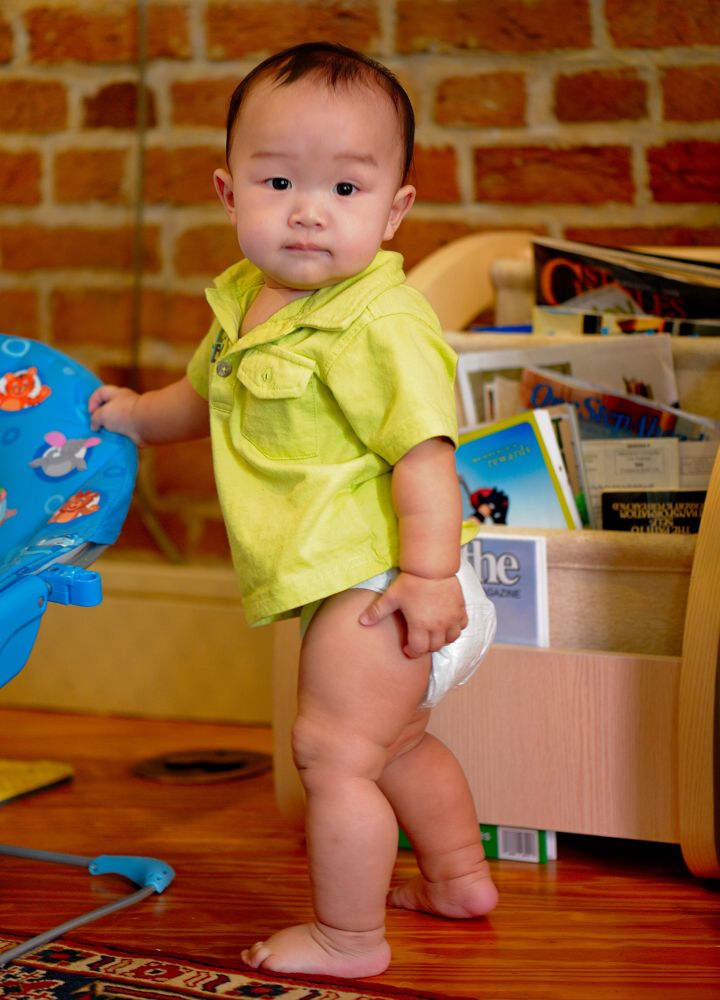 "Who Dat Say......." am I?
Photographed by Jaime Dorotan (girod)
I really liked Michele's
Shy Boy... image. The light highlighted the musician beautifully (after taming a high contrast area on the musician's leg and on the woman in the background) and I think she did a wonderful job capturing the personality and passion of the musician.
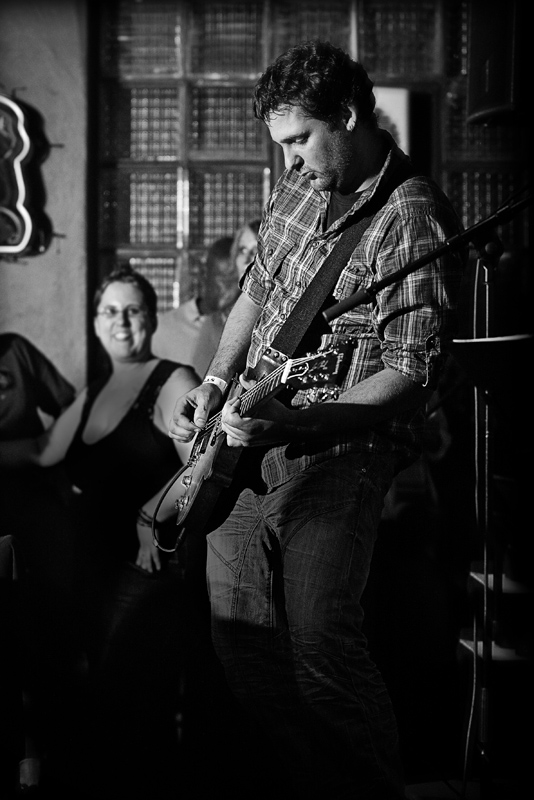 Shy Boy...
Photographed by Michele Bollhalder
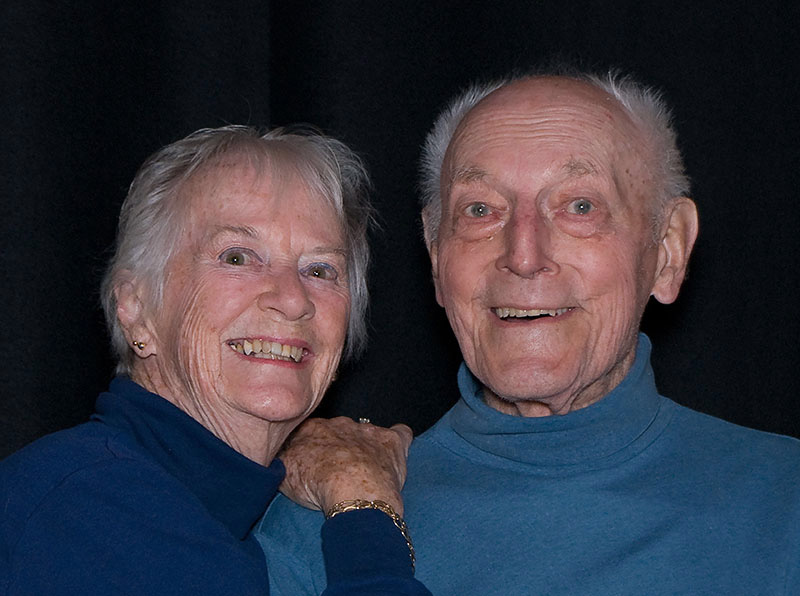
Rick did a great job capturing the personalities of George and Dorothy in his image of the same name. My first inclination was that the white balance was a little off and so I played with the image a bit in Photoshop, using an 8% density magenta photo filter to warm up the skin tones a bit. Then I read Rick's comment that he had used a gold reflector to warm up the skin tones. That explains the slight color cast I was seeing to the skin tones.

This image reminded me of one of the first events Rebecca and I photographed (a charity ball). After spending hours and hours struggling to get the skin tones in our images looking right, we went to a concert together. After intermission in the lobby of the concert hall, we both commented on how much more conscious we were of the hundreds of variations in "skin tones." I found myself much more conscious of skin tones after that experience, and often find myself "re-calibrating" my sense of accurate skin tones when I'm at a public event. I've included my "tweak" of the skin tones in Rick's image for those of you that might be curious. (At least the technique might add a tool to your toolbox when you are struggling with creating pleasing skin tones in your images. Especially for older folks, who often look too "ashen," it sometimes helps to add a touch of magenta.)
 George & Dorothy
Photographed by Rick Pepin
 George & Dorothy
Photographed by Rick Pepin, 8% density magenta photo filter applied in Photoshop
Carol did an
outstanding job with her studio shot of her dog Angel. I love the cute setup, and the nice soft light from her studio soft boxes provides wonderful controlled lighting that shows the detail Angel's fur and the texture of the caldron. Outstanding job Carol.
 Happy Halloween
Photographed by Carol Burkett (carola)
I already described my technique for creating my
Wedding Dance image when I posted the image in the gallery, so I'll only summarize that information here. My challenge was to make the metal shed look elegant, and so I consciously chose an ambient exposure that would hide the metal walls and play up the warm, romantic light provided by the Christmas lights strung across the rafters. I bounced the flash off the ceiling to provide a large, diffused light source, and attempted to balance the flash so that it didn't overpower the cozy ambiance of the warm lights.
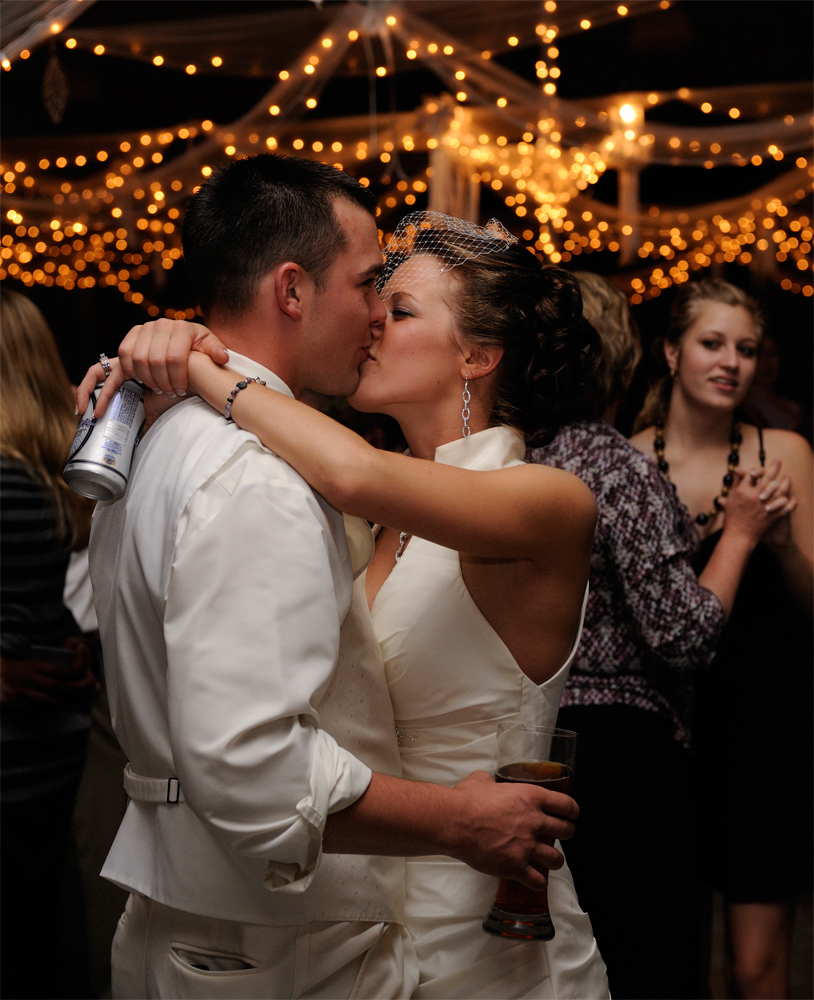 Wedding Dance
Photographed by Keith
Michele did a great job capturing the personalities and energy of the musicians in her
Good old boys image. I thought converting the image to sepia worked well, since it "warmed up" the image and made it more old fashioned and inviting. Great job positioning yourself at the right angle to get good modeling from the stage lights on the musicians' faces Michele.
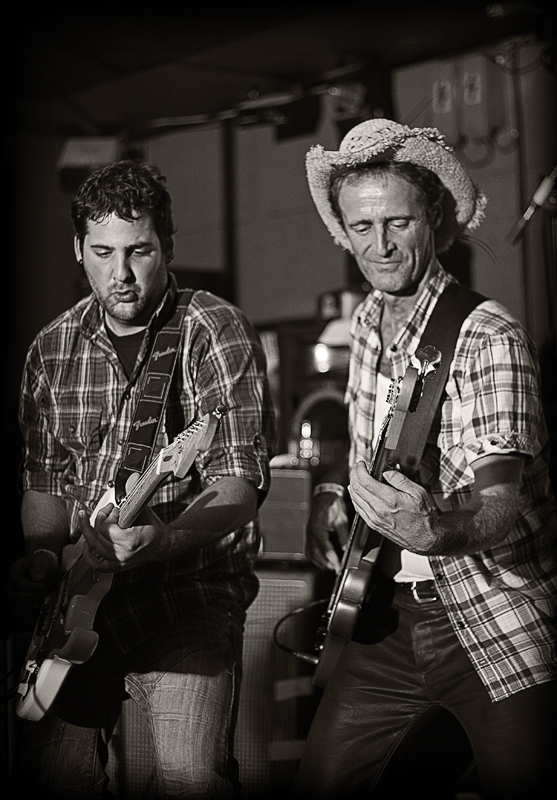 Good old boys
 (Sepia)
Photographed by Michele Bollhalder
My
Bustling the Dress image was a quick grab shot with fill flash to add a bit of "pop" to very soft overcast lighting. I thought the bride's pose was flattering, and the image was a playful mix of Marilyn Monroe glamour and Norman Rockwell Americana. I realized that I cut off the bouquet, and so pulled back to include the bouquet in subsequent shots. A few of the follow-on shots were good too, but the bride's position had shifted slightly and the image lost that playful mix of Marilyn Monroe and Norman Rockwell that I liked so much in this image.
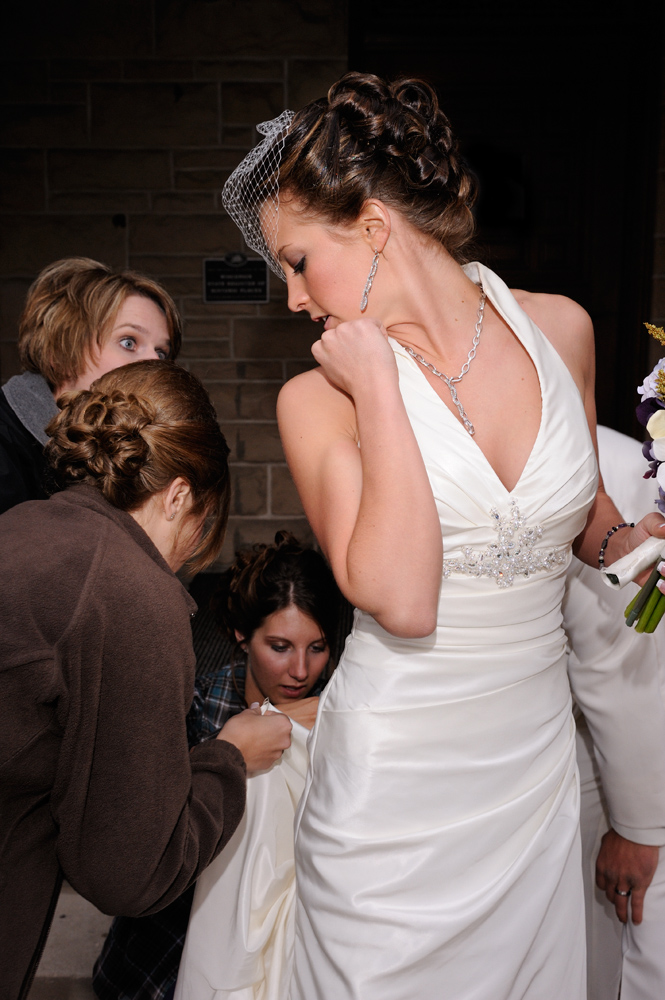 Bustling the Dress
Photographed by Keith
Lars' creative
Death by Jogging image made me smile. I can certainly understand the sentiment.
 Death by Jogging
Photographed by Lars
I thought Rebecca did a nice job with her
Father of the Bride image. Desaturating the color in the background both helped her handle a white balance issue caused by mixed lighting, and helped to reinforce the somber mood of the Dad compared the more carefree mood of his daughter.
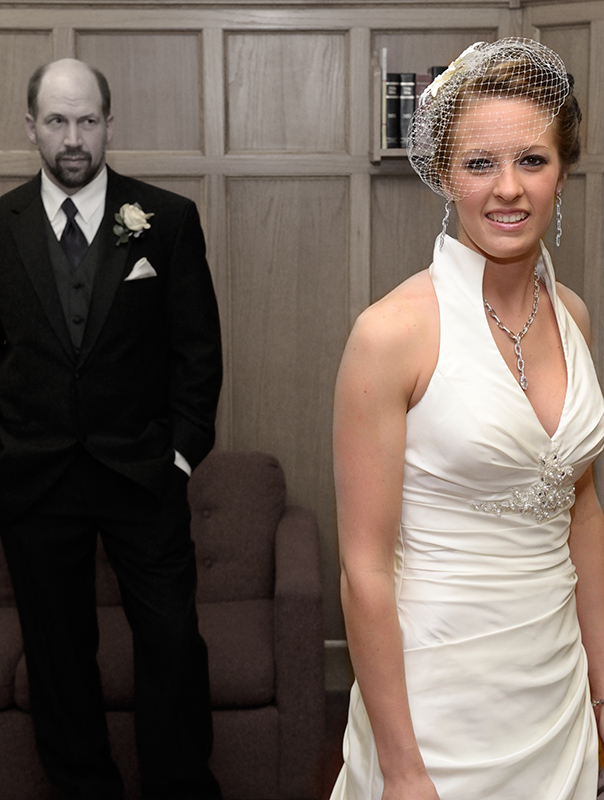 Father of the Bride
Photographed by Rebecca
Rebecca did a nice job with her Celebrate Good Times image as well, creating soft light by bouncing the flash of the ceiling instead of the more harsh light from direct flash. She did a great job capturing the playfulness and energy of the bridal party.
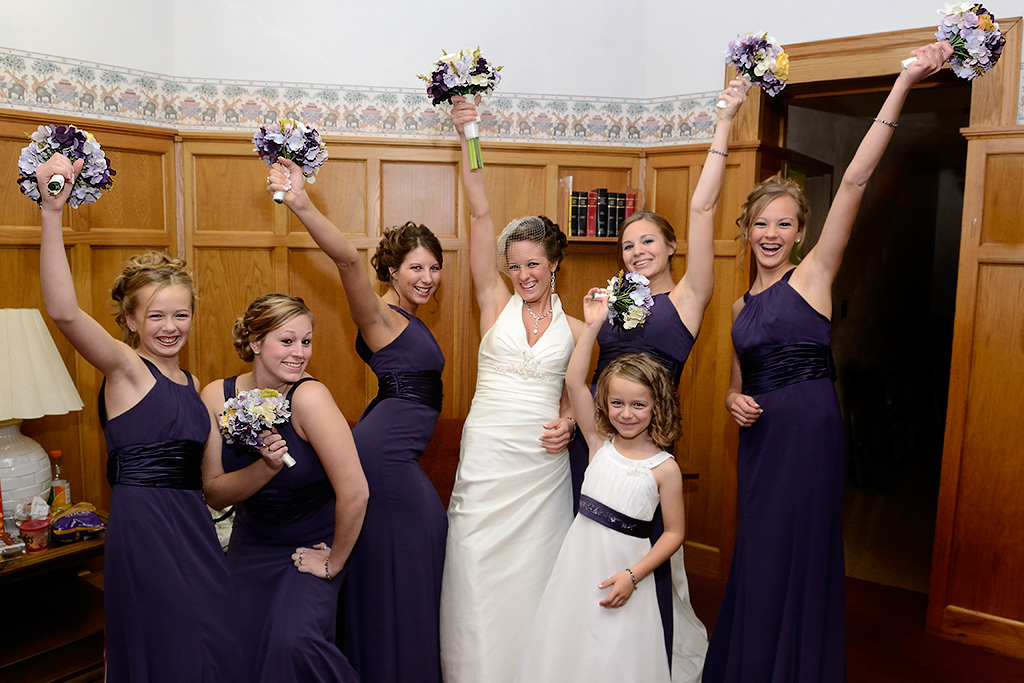 Celebrate Good Times!
Photographed by Rebecca
Julie's fun series of dogs in costume made me smile, and my favorite was
Joe Cool Dog. This shot just seemed to exude personality. Julie did a great job handling the contrast and exposure in her two images of the fire dog, perfectly exposing the white fur on the dog. Nice job Julie.
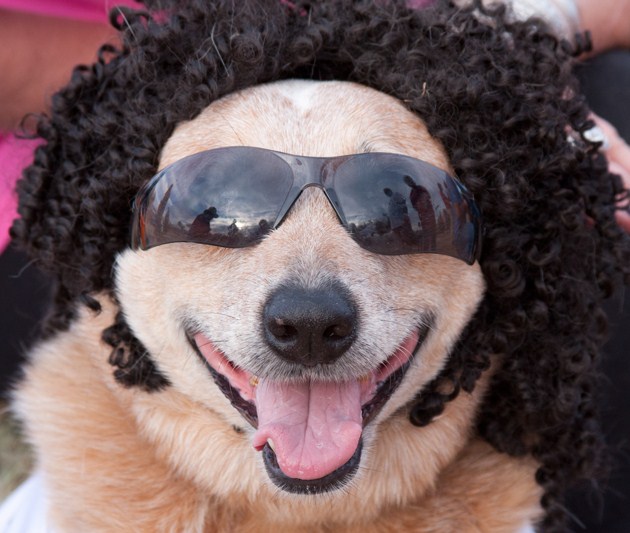 Joe Cool Dog
Photographed by Julie Schroeder (WriteHeart)
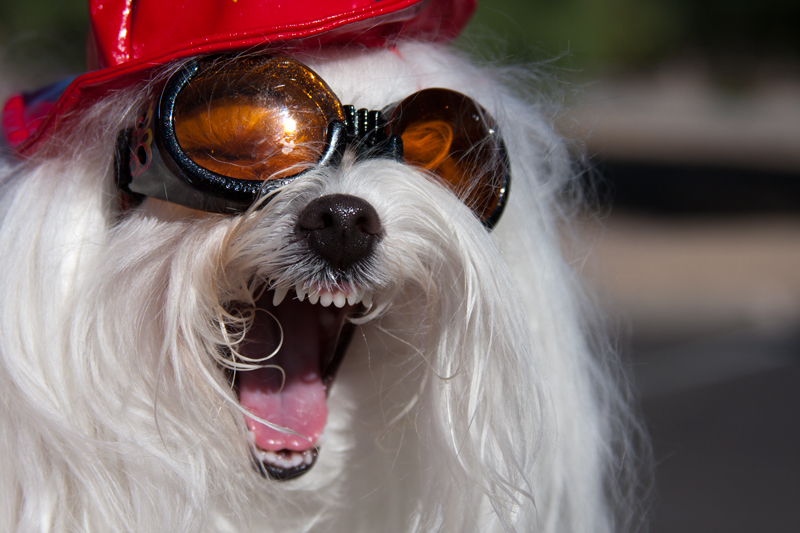 Had enough?
Photographed by Julie Schroeder (WriteHeart)
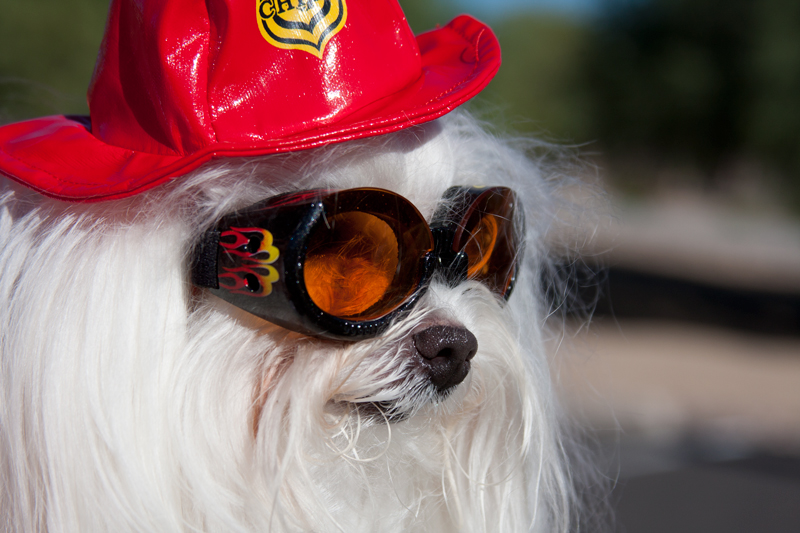 Check out the "doggles"
Photographed by Julie Schroeder (WriteHeart)
Chris submitted a fun series of images too. One of the recommendations I've read on ways to study portrait lighting is to pay attention to lighting patterns in movies and tv productions. I would add "stage productions" as well, for useful examinations of how different lighting patterns affect our perception of the subjects. My favorite images in Chris' series were those that effectively used light to help convey the stage personality of the subject.
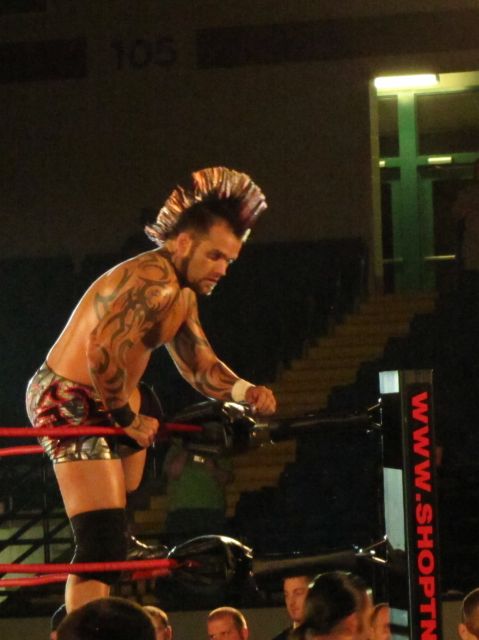 Climbing the Ropes
Photographed by Chris Franklin
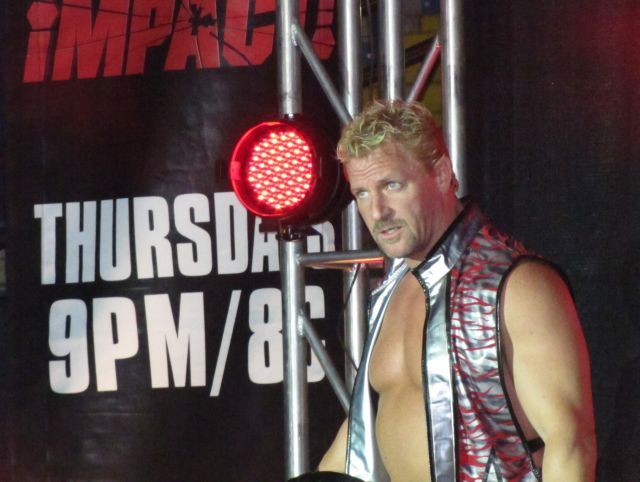 Jeff Jarrett
Photographed by Chris Franklin
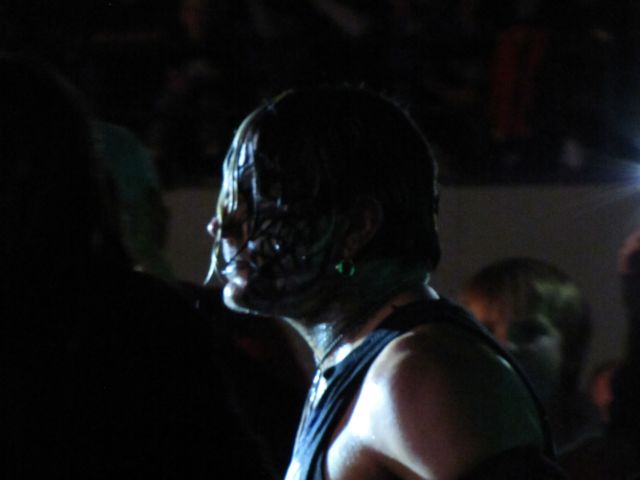 Profile of Evil
Photographed by Chris Franklin
Rick's
Pumpkin Portraits were very well executed. I hope you noticed his comment in the gallery where he stated that he used a tripod and
turned vibration reduction (image stabilization) off. Both Nikon and Canon photographers saw real evidence during our Yellowstone workshop that leaving VR/IS on while shooting on a tripod could lead to severe "smearing" of image detail. You should always remember to turn VR/IS off when shooting from a tripod that is locked down tight. Great job Rick.
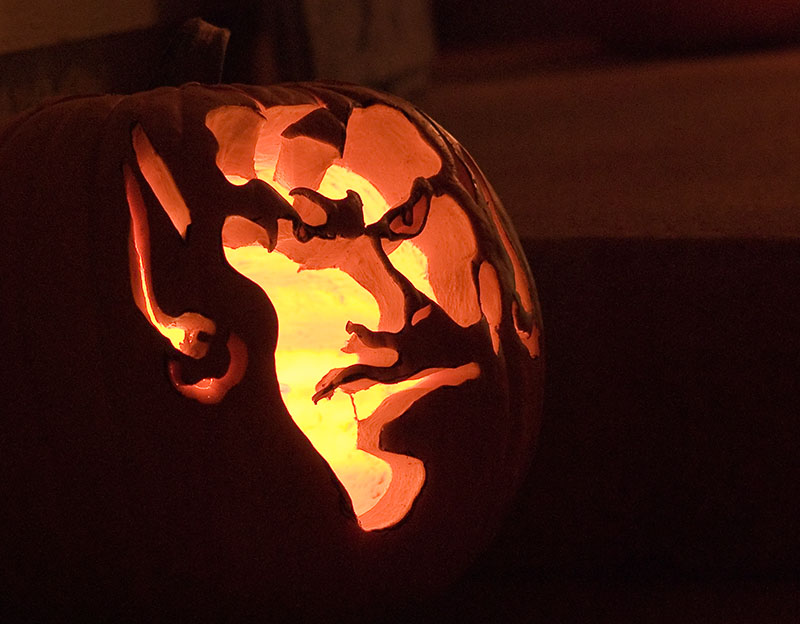 Pumpkin Portrait
Photographed by Rick Pepin (TrvlRick)
 Pumpkin Family Portrait
Photographed by Rick Pepin (TrvlRick)
Marilyn did a nice job with her
Avitar image, nicely balancing the flash exposure so that the subject didn't look "over flashed." As Michele commented, the catchlights in the eyes complemented the reflections from the glue-on beads. We get the sense from this image that Marilyn did a nice job capturing the personality of the young lady in the picture.
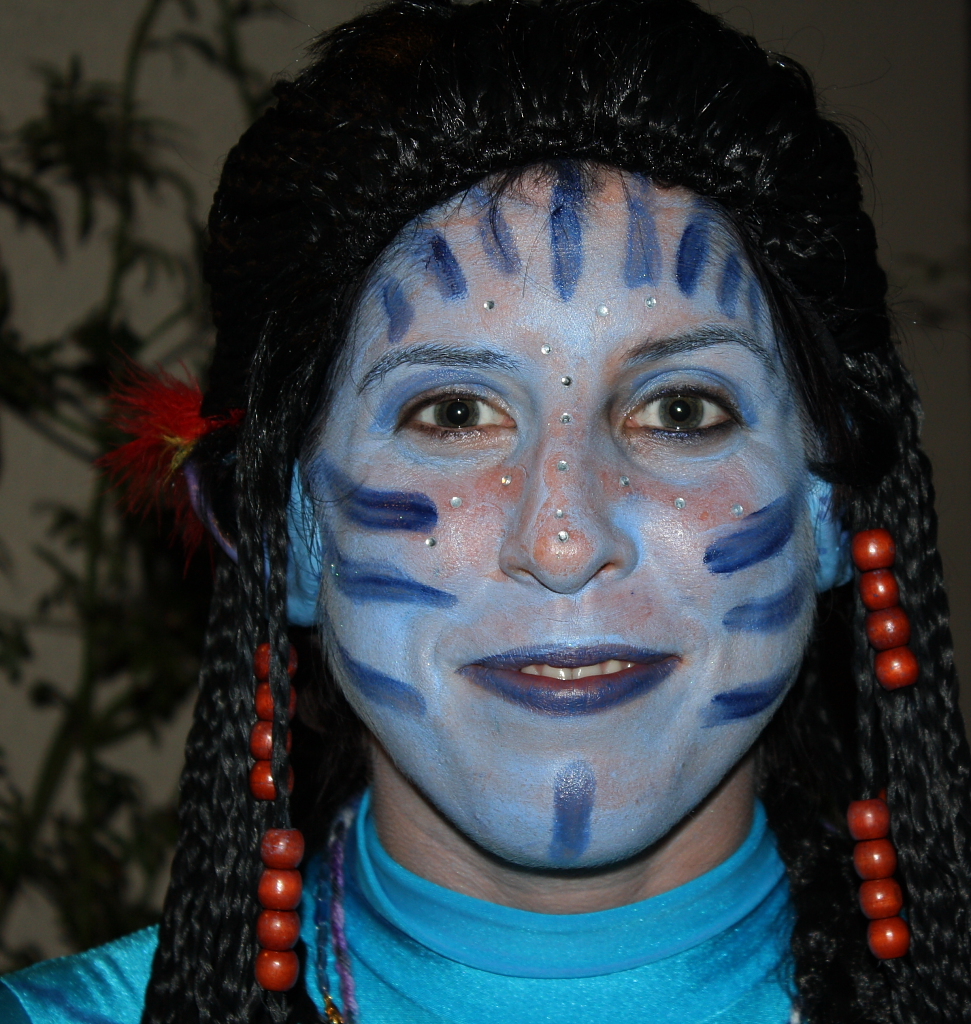 Avitar
Photographed by Marilyn McKinney
Luc's
market image was a wonderful portrait that effectively captured the "persona" of his subject, and conveyed the subject in such a way that we want to know him better. I like the inclusion of the subtle background cues that help the viewer to understand that this image was taken in a market. This was a wonderful portrait Luc.
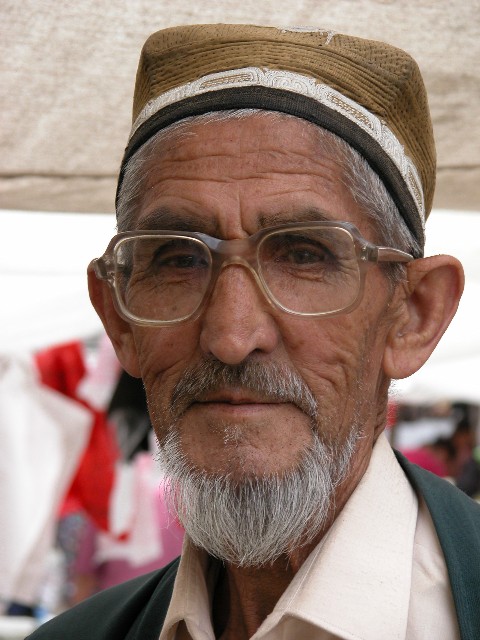 market
Photographed by Luc Bigler
Thank you again to everyone that participated in the "Portraits" assignment. Hopefully you found some of the information included in Chuck Gardner's tutorials useful, and will continue to practice (as I will) the portrait techniques we've talked about. I hope to someday be able to call myself a portrait photographer, and will keep practicing until I feel like I have an intuitive understanding of lighting, posing, and other techniques for conveying the rich personalities of the wonderful people that are all around us in this world.


