Thank you to everyone who participated in "The Gift" assignment. This assignment encouraged me to pause for a moment and reflect on the gifts I had been given. I enjoyed seeing your images of gifts as well.
Thank you to everyone that voted for my image of "Mom's Love" for
People's Choice.
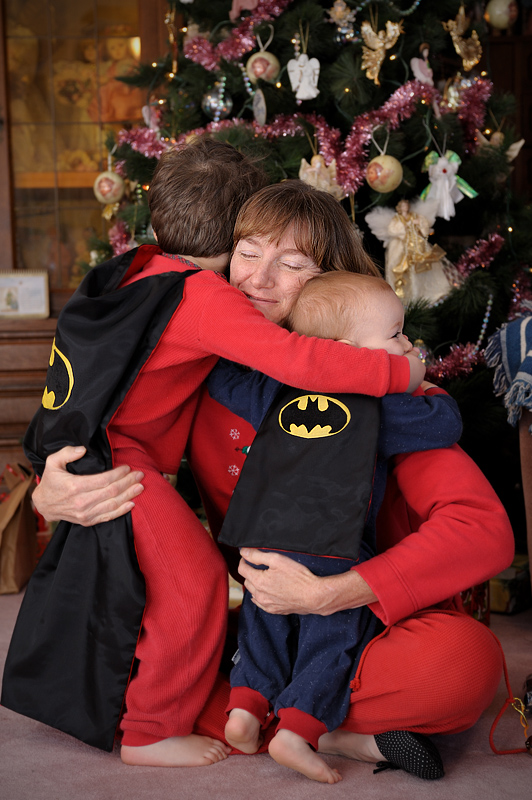 Mom's LovePeople's Choice
Photographed by Keith
I enjoyed Dave Leiker's image of
Elgie. This was a wonderful environmental portrait, and the dramatic light in this image helped define the setting. This composition made it easy to imagine the peacefulness of a late afternoon "cat nap" after a visit from friends and family. I thought Dave did a great job conveying the tone and mood of the setting.
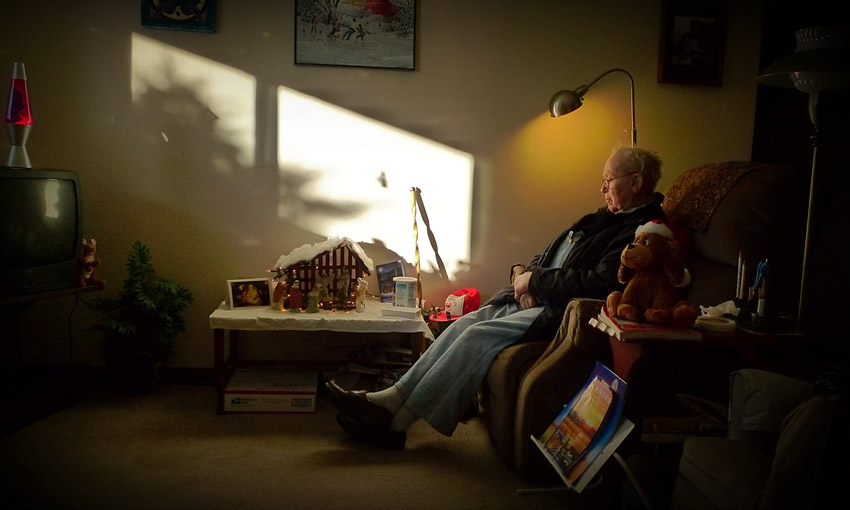 Elgie
ElgiePhotographed by Dave Leiker (prairiedust)
I also enjoyed Rick's image titled
Bodie Finds Her Gift. This was a well presented image. I liked the border treatment, which gave the image the feel of a Christmas card, and had to chuckle when I saw the scene and read the "not a creature was stirring" text on the packages.
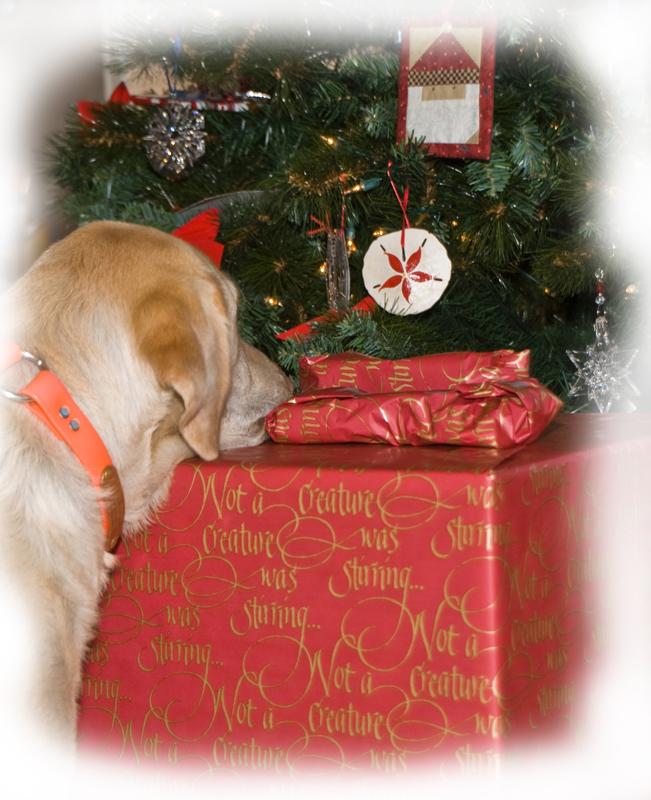 Bodie Finds Her Gift
 Photographed by Rick Pepin
I also liked Sue's
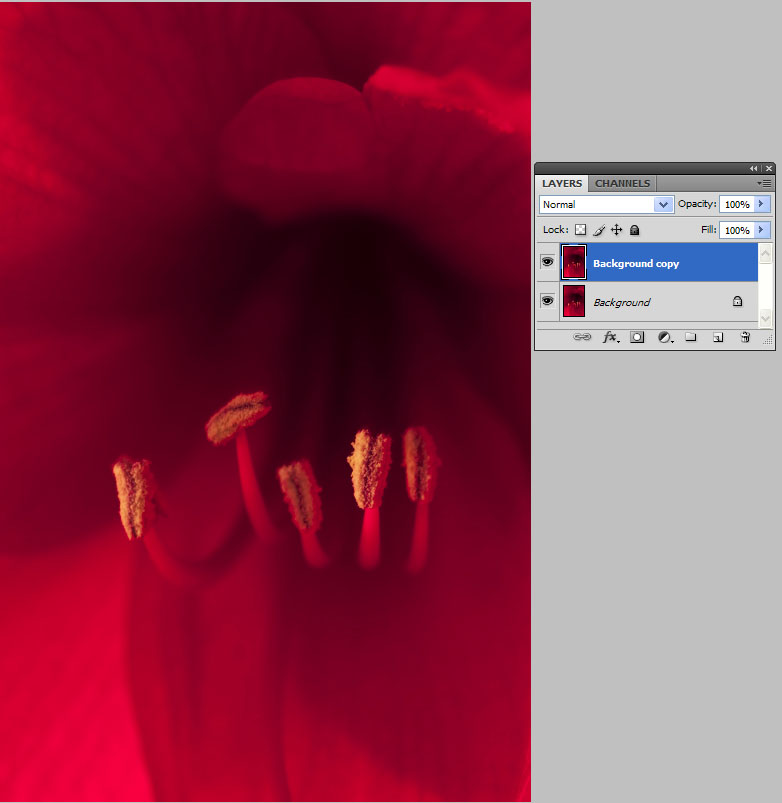
Amaryllis Red image. The one thing that kept this from being a stunning image was that the stamen on the flower were a little soft. Much like you should always try to keep the eyes sharp in a people or animal portrait, you should generally try to keep the stamen sharp on your portraits of flowers. I did notice from the EXIF that this was a 5 second exposure, so potentially that had something to do with the soft stamen, or perhaps the relatively large aperture? (Macro photography generally calls for an aperture of f8 or smaller, due to the extremely small depth of field at close focus distances.) Nevertheless, I thought this image might benefit from "selective sharpening" on the stamen. I've shown the result below. I did notice while I had this image open in Photoshop that the color space was adobeRGB. Since most images will display better in Internet Explorer if they are in sRGB format, I went ahead and changed the color space to sRGB. This might account for any color or contrast differences you are seeing between the two versions.
 Amaryllis Red
 Photographed by Sue Pepin
 Amaryllis Red
Photographed by Sue Pepin, selective sharpening by Keith
Since several people have asked for a lesson on "selective sharpening," I've included the steps below.
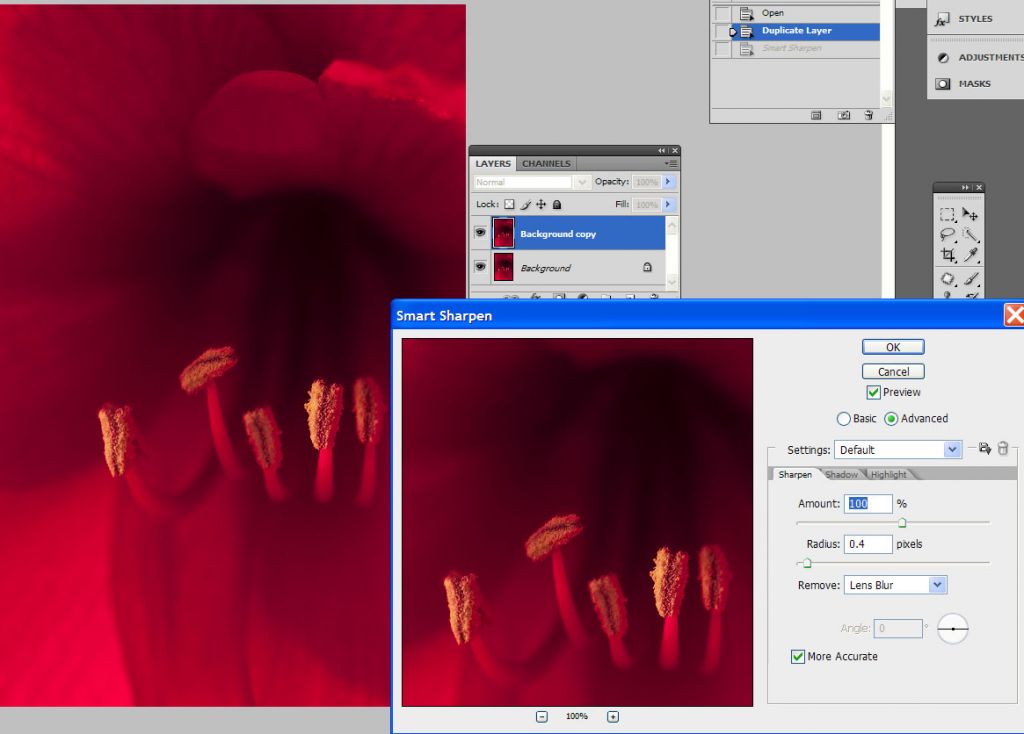
First I made a duplicate of the background layer by right-clicking on the background layer thumbnail in the layers pallete and selecting "duplicate layer" from the popup menu.
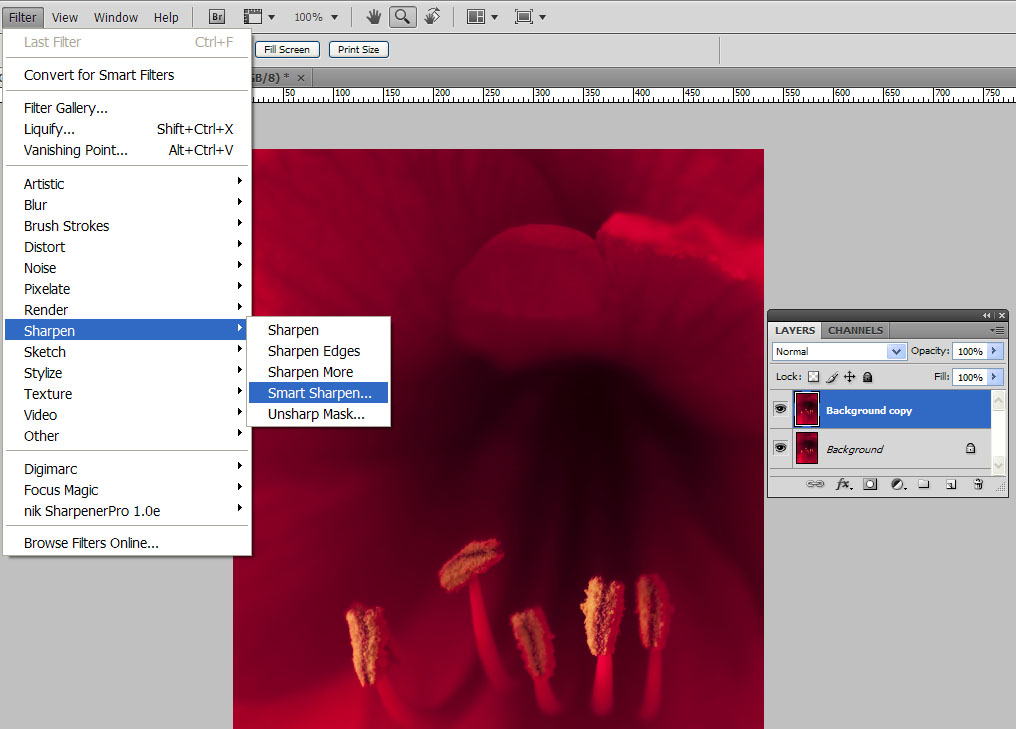
Next, I applied smart sharpening to the layer copy by selecting Filter>Sharpen>Smart Sharpen.
I used settings of 0.4 pixels and 100% and checked
more accurate for my Smart Sharpen settings.
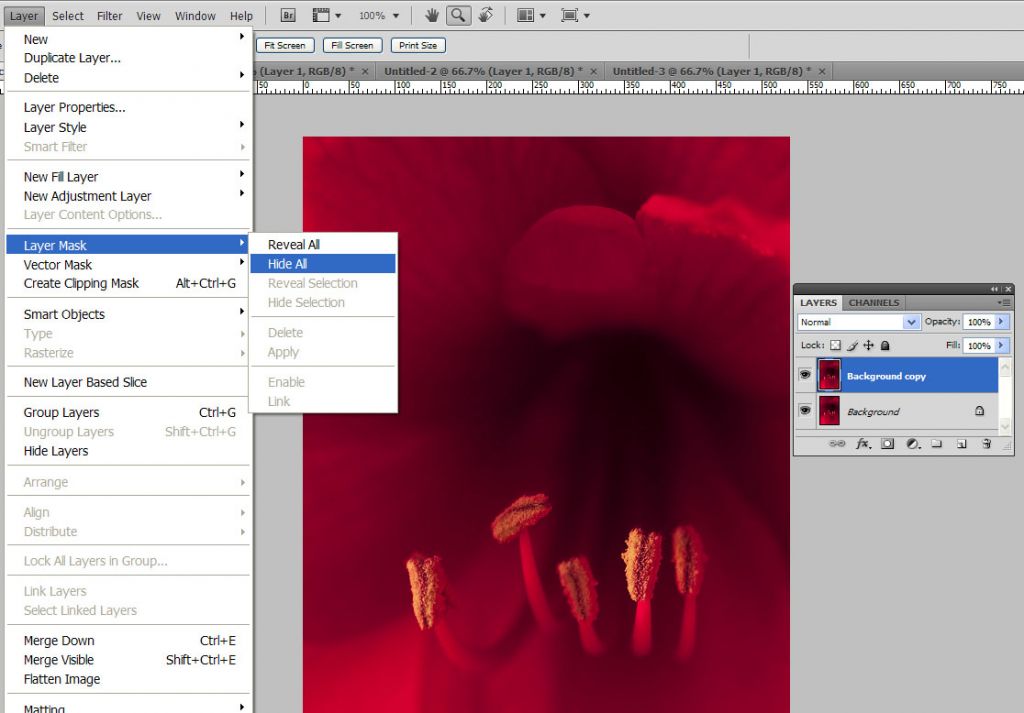
Since I wanted to selectively sharpen only the stamen, I applied a layer mask to the sharpened layer. (Layer>Layer Mask>Hide All)
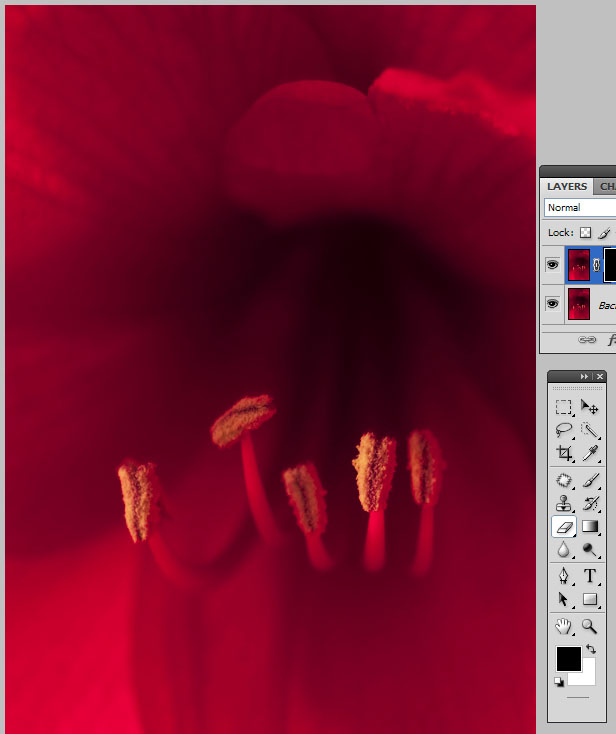
And then used an eraser tool with a soft brush just smaller than the width of the stamen to erase through the mask and reveal the sharpening on the stamen.
As a final touch, I thought the stamen had a bit too much of a red color cast, and so reduced the red on the stamen using the color balance adjustment under Image>Adjustments>Color Balance.
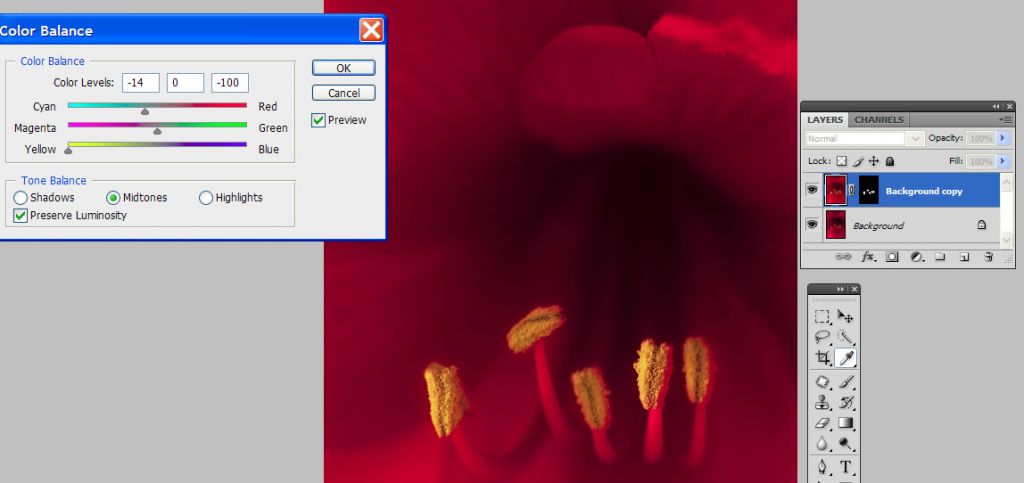
Here's the final result again, with selective sharpening and reduced red on the stamen of the flower and saved in sRGB color space.
Amaryllis RedPhotographed by Sue Pepin, selective sharpening by Keith
Thank you again to everyone that participated in this assignment.
Viewers are encouraged to respond to this thread describing why you like a particular image, or think it was particularly successful at meeting the guidelines of the assignment.
Keith


